WebSTAR 4 Manual & Technical Reference
Start Your Mail Server
To use your WebSTAR Mail server, you must give it the host name and create at least one email account. For much more detailed information, including background on what it means to act as a mail administrator, see
WebSTAR Mail Server Overview
and the following chapters.
Setting the Mail Host Name
Your DNS entry must be set up for mail service: see
DNS
for details.
-
1 Launch the WebSTAR Admin application and connect to your server.
-
2 Bring up the settings window by choosing
Server Settings
from the Edit menu.
-
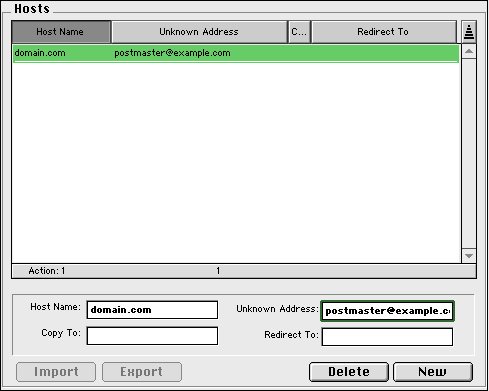
3 Select the
Hosts
option from the
Mail Settings
section in list at the left.
-
4 Click on the
New
button to make a new entry.
-
5 Type this server's host name in the Host Name field.
-
6 Type your email address in the Unknown Address field. Messages for names without user entries will go to this address, so it's a way to catch problems rather than missing them. You can change this address later.
For more information on these fields, see
Mail Hosts
.
-
7 Click on the
Save
button to send the information back to the server.
Creating a Mail User Account
To conform to Internet conventions, you should always have a Postmaster account. If anyone has an urgent need to contact someone in your domain, they are likely to send a message to this account. For more information, see
Reading the Postmaster Messages
.
-
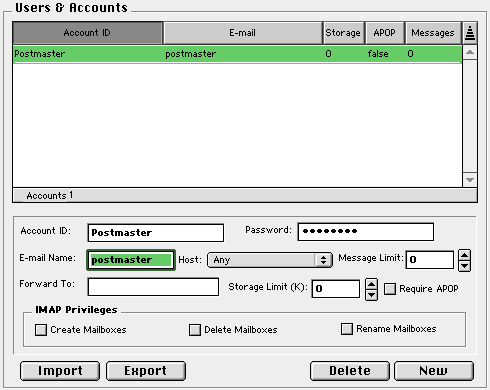
1 In the WebSTAR Admin application, choose the
Users & Accounts
item.
-
2 Type in a
User Name
, such as
Postmaster
. You will use this to log in from your email client program.
-
3 Type in a
Password
.
-
4 Type in the public email name in the
E-Mail
field: this is the part before the @ in the email address. If you want to set up the Postmaster account, just type
postmaster
here.
-
5 The
Host
popup menu lets you select a specific email host and domain name. The default,
Any
, will accept mail for this user name at any of the hosts served by this machine. For example, you could have one Postmaster entry for all hosts.
-
6 Ignore the other settings: the default values will work fine.
For more information on the fields and options, see
Mail Users & Accounts
.
-
7 Click on
Save
to send the settings to the server.
Log Into Your Email Account
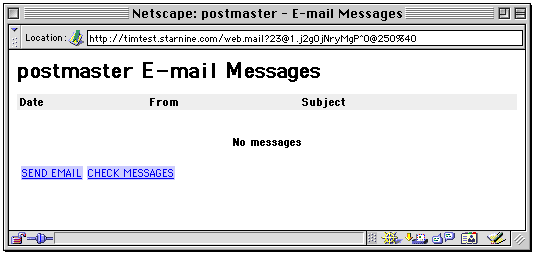
The easiest way to test your email is to use the Web Mail option.
-
1 Type a URL into your browser's location field that ends in
.mail
, such as
http://www.domain.com/web.mail
(replacing "domain.com" with your web host name).
-
2 You'll see a simple login screen. Type the User Name and Password that you created above.
-
3 You'll see the main page for web mail, but you have no messages yet, so it's pretty empty.
-
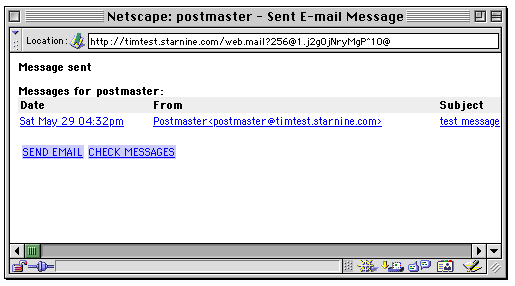
4 Click on the
SEND EMAIL
link to create a new message, address it to yourself, and send it. Be sure to send it to the postmaster account at your host name, for example "postmaster@mail.domain.com".
-
5 If you look at the Mail Monitor on the server or the WebSTAR Admin, you'll see some messages indicating that the message was sent, and then received.
For more information on the Mail server log entries, see
Activity Log
.
-
6 You'll see the message from yourself waiting in the mailbox.
Allow Email Clients to Send Messages
As shipped, WebSTAR Mail only allows the Web Mail to use the server to send messages. This protects your server from being used by "spammers" to send their unsolicited messages to thousands of people.
See also
Dealing With Spam (Unsolicited Email)
.
However, you probably want to allow users to send messages from their email client programs, such as Eudora and Netscape Messenger. You can allow the server to send messages based on when they logged in and read messages.
-
1 Open the WebSTAR Admin and choose the Mail Server Connections item in the list at the left.
-
2 If it's not already checked, click on the checkbox
Enable SMTP Forwarding
.
-
This allows people to send email using this server as their SMTP server.
-
3 Click on the checkbox
Require prior client login
, and type a small number, such as 10, into the
minutes
field.
-
This protects you from the case where users share machine IP addresses when they use dialup accounts, and a spammer might be able to send messages through your server from the same machine after your user has closed their modem connection.
Set the login time delay by balancing security considerations against convenience. See also
Relay Restrictions and Spam Prevention
.
-
4 Click the
Save
button.
Now users will be able to send messages via the WebSTAR Mail SMTP server. However, they will get a "we do not relay" error if they send messages more then 10 minutes after checking their mail. You can increase that interval if your users prefer to send mail without checking every 10 minutes, and you are comfortable with the risk.
Protect Your User Directory
Before continuing, you should limit access to your LDAP server, which provides a directory of the server user names and email addresses. Unfortunately, spammers could access this directory to harvest addresses and send unsolicited messages to your users.
See also
LDAP
and
Mail Allow/Deny
.
-
1 Open the WebSTAR Admin and choose the Mail Server
Allow/Deny
item in the list at the left.
-
2 Select
LDAP
from the Services menu in the upper left corner.
-
3 Click the
New
button to make a new entry.
-
4 Select the
Allow
radio button on the left side.
-
5 Type your domain name in the Address field, with a star to allow all hosts in the domain:
*.domain.com
All other domains are now denied access to the LDAP Server. Creating one or more "Allow" entries automatically denies all non-allowed domains.
-
6 Click the
Save
button to send the information back to the server.
-
7 To test the LDAP server and the security, go to your client, such as the Eudora email application or the Netscape or Microsoft browsers.
-
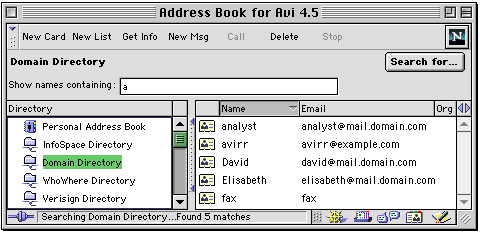
You will need to add a link to the WebSTAR LDAP Server: for example, in Netscape Communicator 4, open the Address Book and choose
New Directory
from the File menu. Just give your LDAP server a name, and enter your server host name, and you'll be able to select it in the Address Book window:
-
8 Go to another machine, outside your domain, and try it again. You should get an error that the LDAP server will not respond. This protects your directory from outsiders.